← Year 1 art worksheets

Year 1 Mark-making: using drawing tools and techniques worksheet

“How artists make marks” is free to print, with no account. It is the first sheet in the Year 1 art unit “Mark-making: using drawing tools and techniques”, for children aged 5 to 6, and takes about 20 minutes.

Print it on A4. The child's pages come first; the answers, and what each wrong answer tells you, are on the grown-up page that follows. Weeks 1 to 3 of the year, 6 sheets in the unit.

Free sample · answers on the last page

How artists make marks

Name: ____________ · Date: ____________
Year 1 · Art & design · about 20 minutes
Answers are on the grown-up page

Today I can name the drawing tools and body parts artists use to make marks.

A Look back3 min

Quick check from earlier learning.

  1. 1.

    What is this shape called?

    trianglesquarecircle
  2. 2.

    Mixing red and yellow makes which colour?

    redyellow
    orangegreenpurple
  3. 3.

    Which of these is a 3D shape?

    cubecircletriangle

B Watch me, then you4 min

Ola wants a huge, bold swoop across her paper. Watch how she moves.
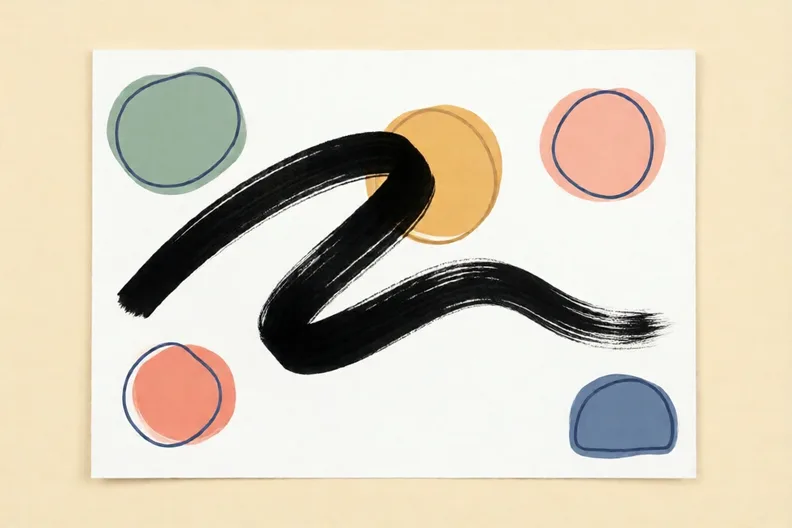
A single bold black ink swoop across a sheet of white paper
Watch me
A single bold black ink swoop across a sheet of white paper

Ola wants a huge, bold swoop across her paper.

She moves her shoulder and swings her whole arm.

The mark is long, wide and bold.

Now you
  1. 1.

    Mia wants a tiny, careful dot. Which part of her arm should do the work?

    shoulderelbowwrist

C Your turn8 min

Look at the tools in the picture. Then match, sort and order.
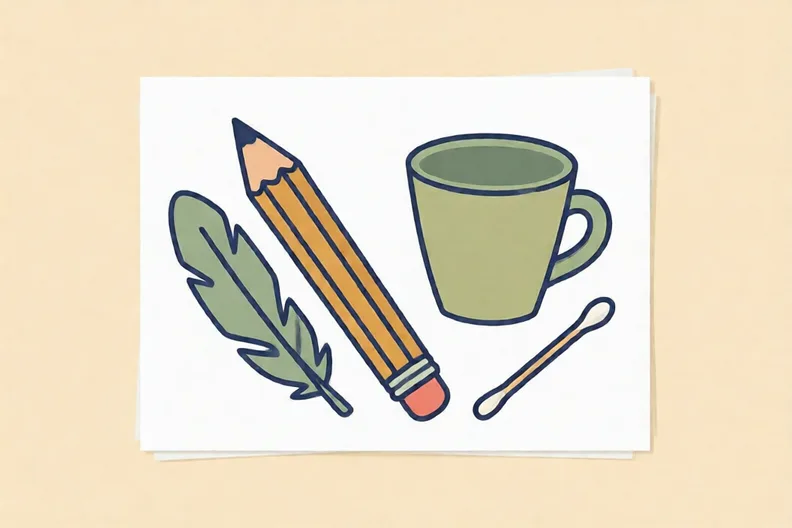
A pencil, a feather, a cup and a cotton bud on a white sheet
  1. 1.

    Join each drawing tool to the mark it makes.

    pencilcotton budcup dipped in paintfeather dipped in ink
    round printsoft feathery markthin linedot
  2. 2.

    Sort each movement by the body part that does most of the work.

    a tiny, careful dota line across the pagea huge swoop of the whole arm
    WristElbowShoulder
  3. 3.

    Make one mark with just your fingers. Then make one with your whole arm. Which mark is bigger?

  4. 4.

    Put these movements in order. Write 1 for the smallest movement and 3 for the biggest.

    1. Move your whole arm from the shoulder
    2. Move only the wrist and fingers
    3. Move from the elbow

Say it out loud: Which tools made thin marks, and which made big soft marks? What changed each time?

D Spot the mistake3 min

Kit says: “Red and blue make green.”
redblue
  1. 1.

    What colour do red and blue really make?

    greenpurpleorange

E Think deeper4 min
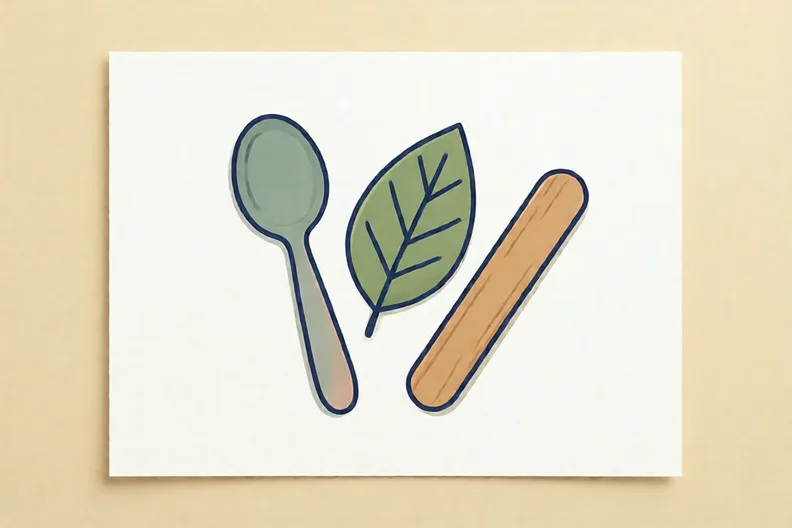
A spoon, a leaf and a lolly stick on a sheet of white paper
  1. 1.

    Find things from around the home that could make a mark. Say what kind of mark each one makes.

How did it feel?

I can do it Nearly Not yet
StudyDen · Year 1 · Art & design · Mark-making: using drawing tools and techniquesAnswers are on the grown-up page

For the grown-up

How artists make marks · 2 minutes to read

Answers, and what a wrong one tells you

A

1. square If they say circle, ask them to count the corners. A square has four corners and four straight sides.

2. orange If they say green, they have probably used blue by mistake. Red and yellow make orange. Ask them to mix the two again and look.

3. cube If they pick circle, ask them to point out a flat side. A circle is flat, but a cube has faces you can touch and turn.

B

1. wrist If they say shoulder, they have pictured a big swoop. Ask them to make a tiny dot with only the wrist and fingers and notice it stays small.

C

1. pencil → thin line; cotton bud → dot; cup dipped in paint → round print; feather dipped in ink → soft feathery mark If the pencil is joined to a round print, ask them to press a pencil and a cup on paper and compare the two marks.

2. Elbow: a line across the page · Wrist: a tiny, careful dot · Shoulder: a huge swoop of the whole arm If the swoop is in the Wrist column, ask them to make a swoop with only their fingers. Then ask which part must move to make a big swoop.

3. Look for: Says the whole arm mark is bigger, wider or longer than the finger mark.

4. 1 Move only the wrist and fingers · 2 Move from the elbow · 3 Move your whole arm from the shoulder If they put the shoulder first, ask them to hold a pencil and move only the fingers. Then move from the elbow, then the shoulder, and say what changes.

D

1. purple If they say green, Kit has mixed up green, which comes from blue and yellow. If they say orange, they have mixed red and yellow. Ask them to mix red and blue and look at the colour.

E

1. Look for: Names at least one household object and the kind of mark it would make.

Words to use

Say“Which part of your arm is doing the work right now?”
Instead of“Tell them their marks are wrong and to try again.”

After the sheet

Put a little paint on a plate. Dip a cotton bud and a spoon, and make marks on paper. Notice which joint moves for big marks and which for small ones.

Tick what your child got right in StudyDen. Anything missed comes back in a later Look back box, so there's no need to redo the sheet.

The rest of this unit

5 more sheets come with a StudyDen plan, in teaching order:

  1. Marks That Show Feelings(with a plan)
  2. Ink and water marks(with a plan)
  3. Textured marks with charcoal(with a plan)
  4. Patterns Everywhere(with a plan)
  5. Marks without a hand(with a plan)

Every Year 1 art worksheet

The worksheets plan opens a printable sheet for every lesson in Years 1 to 6, each with its answers on a separate page for you. It costs £6.99 a month or £59 a year for the whole family, with no free trial.

The full StudyDen plan adds the lessons themselves, marked as your child works, with the worksheets included. It is 7 days free, then £29.99 a month.

Both start with a free account; you choose the plan when you sign up.